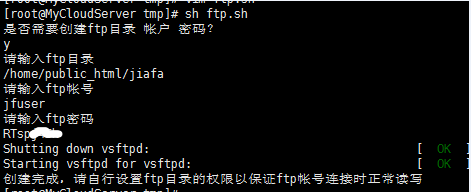
useradd -m -s /bin/bash syncthing_user
passwd syncthing_user #创建密码wget https://github.com/syncthing/syncthing/releases/download/v1.26.0/syncthing-windows-amd64-v1.26.0.zip
tar -zxvf syncthing-linux-amd64-v1.26.0.tar.gzmv syncthing-linux-amd64-v1.26.0 /usr/local/syncthingvim /usr/local/syncthing/check_start.py
#!/usr/bin/python
#coding:utf-8
import os,time
#当前文件路径
current_path = os.getcwd()
log_file = current_path+'/check.log'
def is_runing(process_name):
        try:
                process = len(os.popen('ps aux | grep "' + process_name + '" | grep -v grep').readlines())
                if process > 0:
                        return 1
                else:
                        return 0
        except:
                return 0

def log(message):
        os.popen('echo ['+time.strftime("%Y-%m-%d %H:%M:%S", time.localtime(time.time()))+'] '+message+' >> '+log_file)

proc_tag = '/usr/local/syncthing/syncthing'

if is_runing(proc_tag) == 0:
        log('syncthing 进程没有运行或已停止!')
        os.popen('/sbin/runuser -l syncthing_user -c '+proc_tag.replace('$','')+' >> /dev/null &')
else:
        log('syncthing 正常')
chmod +x ./check_start.py
添加到定时任务,一分钟检查一次脚本运行情况
* * * * * python /usr/local/syncthing/check_start.py此刻如果运行没问题,本机访问 http://127.0.0.1:8384/ 就能进到到syncthing的gui了,对要同步的目录要给于相应的读写权限才能正常运行任务。
如果是无桌面Linux,要访问webui只有通过外网ip访问,即服务器的 http://服务器ip:8384 ,则涉及到防火墙端口放行、https加密、以及使用用户名密码登录gui。
配置syncthing的非本机访问,即局域网或公网访问。
1、编辑配置文件,配置文件在程序第一次运行时会自动创建,存放在用户目录的.config/syncthing/config.xml下
vim /home/syncthing_user/.config/syncthing/config.xml
找到
<gui enabled="true" tls="false" debugging="false" sendBasicAuthPrompt="false">
<address>127.0.0.1:8384</address>
<apikey>xxxxxxxxxxxxxxxxxxxxx</apikey>
<theme>default</theme>
</gui>
修改为
<gui enabled="true" tls="true" debugging="false" sendBasicAuthPrompt="false">
<address>0.0.0.0:8384</address>
<user>myusername</user>
<password></password>
<apikey>xxxxxxxxxxxxxxxxxxxxx</apikey>
<theme>default</theme>
</gui>
以上变动的地方为
<gui ... tls="true" ..> 启用了https
<address>0.0.0.0:8384</address> 监听
<user>myusername</user> 用户名
<password></password> 密码
password一定为用空,因为这里写明文是不对的,登录会一直密码错误,保持为空在登录后通过gui设置。
2、防火墙根据业务需求开启端口 8384 和 22000,端口开放一般建议白名单,尤其还是无密码的情况下。
firewall-cmd --zone=public --permanent --add-rich-rule='rule family="ipv4" source address="192.168.10.22" port protocol="tcp" port="8384" accept'
firewall-cmd --zone=public --permanent --add-rich-rule='rule family="ipv4" source address="192.168.10.22" port protocol="tcp" port="22000" accept'
firewall-cmd --reload
3、目录权限,由于需要同步的目录一定是其它应用程序权限,因此需要增加syncthing用户的权限或直接设置为77X等
setfacl -R  -m u:syncthing_user:rxw /web/public_html/agentmanage
setfacl -R  -d -m u:syncthing_user:rxw /web/public_html/agentmanage
#其中参数-n 为不重新计算mask ,移除参考如下
setfacl -R -x u:www /web/public_html/agentmanage/data/runtime/log #移除www用户的facl权限[root@localhost]# ./syncthing --upgrade
13:37:25 INFO: Default folder created and/or linked to new config
13:37:27 INFO: Upgrade available (current "v0.14.43" < latest "v1.1.1")
13:37:35 INFO: Upgraded to "v1.1.1"本文《linux下syncthing同步工具的部署记录,自启动》由爱思考吧 isres.com 分享,转载请注明出处。本文网址:https://www.isres.com/bushu/10.html
本站主要收集测评能够节省时间和提升效率的软件工具并分享使用与学习的过程和感受,任何情况下用户都需遵守所使用软件资源的相关协议。与《linux下syncthing同步工具的部署记录,自启动》有关的本站文章及资源仅供个人学习交流使用,相关资源请下载后24小时内删除,请勿用于其它用途,因此产生的任何问题由您自行承担。


